My fam damily

My fam damily

Wednesday, May 1, 2024

Glazed Pigs in a Blanket Recipe


Did you know National Pigs in a Blanket Day is a thing? It's April 24th, by the way ;)  I sometimes like to cook recipes based off silly National Holidays and found this one, so I just had to try it. I made it to bring in to work for lunch and it was a big hit! The glaze is so yummy! I found the original recipe Here

Enjoy!


INGREDIENTS

For the Pigs in Blankets:
  • 1 (12 oz.) package Hillshire Farm Lit'l Smokies or other mini hot dogs
  • 2 tubes crescent rolls
For the Glaze:
  • 1/2 c. unsalted butter
  • 2 T. brown sugar
  • 2 T. yellow mustard
  • 2 tsp. Worcestershire sauce
  • 2 tsp. poppy seeds
  • 1/2 tsp. onion powder
  • pinch of salt
  • pinch of pepper

INSTRUCTIONS

  1. Unroll crescent roll dough and separate the triangles. Cut each triangle (through the point) into two pieces, creating two long triangles from each.
  2. Place a Lit'l Smokie toward the wide end of each crescent dough piece. Beginning at the wide end, roll each Lit'l Smokie up in the crescent dough, ending at the dough's tip. Each Lit'l Smokie should peek out a bit on both sides of the roll.
  3. Place rolls in a 9x13-inch baking dish greased with non-stick cooking spray.
  4. Melt butter in a small saucepan. Add brown sugar, mustard, Worcestershire sauce, poppy seeds, onion powder, salt, and pepper. Bring to a boil; remove from heat as soon as glaze comes to a boil.
  5. Brush tops of pigs in a blanket rolls with glaze to coat each one. Then pour remaining glaze over rolls.
  6. Bake uncovered at 375℉ for 25-30 minutes, until golden brown.

Sunday, January 7, 2024

Tin foil dinners, or known as Hobo Dinner, are a fave in our house. This instapot recipe is an quick alternative and tastes great! I also added muchrooms to mine and omitted the onions.


I found this recipe here: https://www.365daysofcrockpot.com/instant-pot-hobo-casserole/ 

and they also include cooking instructions for a crock pot option! 


Ingredients


  • 1 pound lean ground beef
  • 1 cup diced onions
  • 3/4 tsp kosher salt
  • 1 tsp black pepper
  • 1 tsp onion powder
  • 1 tsp garlic powder
  • 1 tsp chili powder
  • 1 cup beef broth
  • 4 medium carrots, peeled and cut into chunks (or baby carrots)
  • 1 pound Russet potatoes, peeled and cut into 1 inch cubes
  • 1 (10.5 oz) can cream of mushroom soup

Instructions

Instant Pot Instructions:

  1. Turn Instant Pot to saute setting. When display says HOT add in the beef and break it up. Add in the onions. Brown for about 5 minutes. If there is excess grease drain it off. Add in the salt, pepper, onion powder, garlic powder and chili powder. 
  2. Pour in the broth and scrape bottom of pot so that nothing is sticking. Turn off Instant Pot. 
  3. Dump in the carrots, potatoes and finally the soup. Don’t stir.
  4. Cover Instant Pot and secure the lid. Make sure valve is set to sealing. Set the manual/pressure cook button to 3 minutes. When time is up release pressure by moving valve to venting. Remove the lid.
  5. Stir. Season to taste with salt and pepper. Serve and enjoy!

Slow Cooker Instructions:

  1. Heat a pan over medium high heat. Add in the beef  and break it up. Add in the onions. Brown for about 5 minutes. If there is excess grease drain it off. Add in the salt, pepper, onion powder, garlic powder and chili powder. Add the mixture to the slow cooker.
  2. Stir in the broth, carrots, potatoes and soup. 
  3. Cover and cook on low for 4-6 hours.
  4. Stir. Season to taste with salt and pepper. Serve and enjoy!
Serves 6 

Nutrition Facts
Calories per serving: 249 
Total Fat 8.3g
Saturated Fat 2.7g
Cholesterol 47.5mg
Total Carbs 24.5g
Sugars 3.9g
Sodium 678.3mg
Dietary Fiber 3.2g
Protein 19.3g

Tuesday, December 29, 2020

Broccoli Cheddar Chicken Braid


Broccoli cheddar chicken braid for dinner... sooo good! This is a family favorite!

You will need:
2 cans Crescent Rolls (I used the reduced fat ones)
2 cups cooked chicken chunks
2 cups Cheddar Cheese (I used sharp)
2 cups steamed chopped broccoli
1/2 cup light Mayo
1 egg yolk
Rosemary (I used what I had in my seasoning cupboard or you could buy some fresh rosemary too)

1. Preheat oven to 375 degrees F
2. Spray some non stick spray onto a cookie sheet, and spread both cans of crescents length wise to form a long rectangle.
3. Press each of the seams to form a single layer of dough.
4. In a large bowl, combine chicken, cheese, broccoli and mayo.
5. Spread mixture over the center of the croissant dough evenly to create a log.
6. Using a sharp knife, cut horizontal strips 1 inch apart down each side of the crescent dough.
7. Fold the dough strips over the top of the mixture, alternating left and right to create a braid.
8. Brush the top of the braid with a beaten egg yolk and sprinkle rosemary on top.
9. Bake for 28-30 until golden brown. (I cooked mine for 40 minutes to get the dough a bit crispier, that's just how we like it)

https://drive.google.com/uc?export=view&id=11fG8VUcNArBve4oStQIjpQf7umHbaFVN

It's really easy! And yummy!

Wednesday, September 23, 2020

Spinach Artichoke Bubble Bake


After my work day, I wanted to make something for dinner that was quick to put together so I could simply relax. 

So I skipped quite a few steps by simply using a tub of spinach artichoke dip from Costco, mixed in a cup of mozzarella cheese and a can of chicken (drained), two tubes of biscuits, cut each biscuit into 4ths and mixed in with the mixture, top with another cup of Mozzarella and then baked at 350 degrees in a 9x13 dish for 50 minutes, covering at 30 minutes for the last 20. 

It was SO good! Everyone approved and there’s none left, so I’d call that a success!

1 tub spinach artichoke dip from Costco
1 can chicken, drained
2 cups mozzarella cheese 
2 tubes biscuits

• Mix dip, chicken, and 1 cup of cheese.
• Cut up each biscuit into 4ths. Place in 9x13 baking dish with the mixture and mix up, make sure to coat them all.
• Sprinkle remaining cheese on top
• Bake at 350 degrees for 50 minutes, cover for remaining 20 minutes.

That’s it! Tell me what you think of you try it! Enjoy!

Sunday, September 20, 2020

Copy Cat Hibachi Ginger Peanut Dressing - YUM!


I absolutley love the dressing they put on the salad at our local hibachi spot. I found this copycat recipe on Pinterest and I am so happy I did! So delicious!

Ingredients:
• 6T rice vinegar
• 1T fresh ginger, peeled
• 2 garlic cloves, minced
• 3T vegetable or canola oil
• 1tsp toasted sesame oil (Asian sesame oil) 
• 1/4 C creamy peanut butter
• 3T soy sauce
• 3T honey

Put all Ingredients in your food processor and mix until smooth. 

That’s it! So easy!! I store mine in a mason jar, it didn’t last long so I can’t say for sure how long it’s good for, it was gone by day 3 and still tasted great! This was a hit with my entire family!

Thursday, July 6, 2017

Delicious Baked Mayo Parmesan Chicken

I found several variations of this low-carb, Keto friendly recipe with rave reviews and had to try it myself!  It did not disappoint.

This chicken was moist and flavorful, it's one that I will for sure be making more regularly!  And best of all, it is super easy to make!


Ingredients:
4 Boneless, skinless chicken breasts
3/4 cup full fat mayo
6 Tbsp shredded Parmesan cheese
1/2 tsp poultry seasoning
3/4 tsp garlic powder
ground black pepper to taste 
Directions:
Preheat oven to 375.  Spray baking dish with non stick cooking spray.
Put each breast inside a small ziploc bag and pound with a meat mallet until the chicken is an even thickness.  Then cut small, shallow crosswise slits going down each chicken breast, being careful not to cut through.
Mix the mayo and seasonings, then stir in the parmesan.  Put chicken breasts into the baking dish and spread the mixture over the top of each chicken breast, covering the entire surface.  I used a spatula to spread.
Bake the chicken for 35 minutes, or until the juices run clear and the top is nicely browned.   


I only used two breasts, because they were gigantic!  The two made four servings, we ended up just cutting them in half.


I know a lot of Keto-ers will say Best Foods Mayo is NOT Keto.  But, it was all I had.    


 I think next time I will try putting some real bacon crumbles on top, or mixed in with the mayo and Parmesan.  Because, bacon.

I found the original recipe on www.kalynskitchen.com 

On MyFitnessPal, I figured this recipe to be 
350 calories per serving
2.5g carbs
21g fat
42g protein

Wednesday, January 27, 2016

Cauliflower Fried Rice

I tried this tonight and YUM!  So good!  I added shrimp and also used Flavor God Garlic Lover's seasoning, their seasonings are awesome!!  I did not have just peas and carrots, but I had a bag of mixed veggies so my version also had corn and green beans in it which still tasted fantastic.  

I found this great recipe at http://therecipecritic.com/2015/01/cauliflower-fried-rice/


Ingredients
  • 1 head of cauliflower, (about 2½ cups chopped in a food processor)
  • 2 Tbs sesame oil
  • 1 small white onion, chopped
  • 1 cup frozen peas and carrots, thawed
  • 2-3 Tablespoons soy sauce (more or less to taste)
  • 2 eggs, lightly beaten
  • 2 Tbsp chopped green onions (optional)
Instructions
  1. Rinse and chop the cauliflower into florets and put into a food processor. (If you don't have a food processor continue to chop the cauliflower into tiny pieces.) Pulse until the cauliflower until it is small and resembles rice.
  2. Preheat a large skillet or wok to medium heat. Pour sesame oil in the bottom. Add white onion and peas and carrots and fry until tender.
  3. Slide the onion, peas and carrots to the side, and pour the beaten eggs onto the other side. Using a spatula, scramble the eggs. Once cooked, mix the eggs with the vegetable mix.
  4. Add the cauliflower to the veggie and egg mixture. Pour the soy sauce on top. Stir and fry the rice and veggie mixture until heated through and cauliflower is tender. Add chopped green onions if desired.

Wednesday, September 2, 2015

Healthier Chicken Parmesan

Recipe share time! This dinner was so yummy and simple to prepare, perfect for a week night dinner! You can prep some of it a little ahead too, like flatten the chicken, to get it on the table in even less time! 


Friday, May 22, 2015

Taco Pasta Salad


Looking for a side dish perfect for all of this summer's BBQ's?  This one is it.  Perfect for large groups since it makes a lot, and it's a unique change from the typical potato and macaroni salads.  Everyone always asks for the recipe once they've tried it!

Ingredients:

1 (16 oz) package tri-color rotini pasta
1 (15 oz) can black beans, drained and rinsed
1 (11 oz) can mexican style corn, drained
1 (4 oz) can chopped green chilies
1/2 cup italian style salad dressing, or more to taste
1/2 cup shredded Mexican cheese blend
1/3 cup minced fresh cilantro
2 tbsp taco seasoning mix
1/2 lime, juiced

Directions:

1. Bring a large pot of lightly salted water to a boil; cook the rotini at a boil until tender yet firm to the bite, about 8 minutes.  Drain, and rinse with cold water, place in fridge to cool.

2.  Mix black beans, corn, green chilies, italian dressing, mexican cheese, cilantro, taco seasoning and lime juice together in a bowl.  Add rotini and lightly stir to combine.

3.  All done!  This tastes best freshly mixed, so it is ideal to wait until right before serving to mix the rotini with the sauce mixture.  To refresh leftovers, just add a little bit of italian dressing and stir to combine!

Enjoy! Take a picture and share how yours turned out!  Or share any yummy extras you added!  


Tuesday, March 24, 2015

Baked Pears

This is such a delicious recipe, I found it on Pinterest and OMG! So good. Perfect fix for that sweet tooth and best part, it's good for you!


Ingredients:

4-5 Bosc Pears
2 tbsp honey
2 tbsp coconut oil
1 tsp vanilla extract
1/4 tsp cinnamon

Directions:

1. Cut pears in half and remove core
2. Place on 8x11 baking dish cut part facing down
3. Mix together honey, coconut oil, vanilla and cinnamon in sauce pan. Cool at med/high setting, bring just to a boil stirring occasionally, and remove from heat.
4. Drizzle sauce over pears and cook for 30-35 minutes at 400 degrees.
5. Let stand for 5 minutes before serving. Spoon any extra sauce over pears and serve :)

Yum!

Monday, March 23, 2015

Grilled corn & Poblano Guacamole

I. Love. Guacamole.

Let me repeat.

I. LOVE. Guacamole.

Ok, now that I have confessed my love, let me tell you I have recently found a delicious recipe for... You guessed it. Guacamole! 💃 


It's hard to get a good pic of guacamole I decided... Just trust me. It's good.

Ok, so here is what you'll need:

3 has avocados
1 tsp garlic, minced
1/4 tsp cumin
1/2 tsp salt
1/2 lime, juiced
1 tbsp cilantro 
1 poblano pepper, grilled and diced 
1 corn on cob, grilled until slightly charred and kernels removed

Combine all ingredients into medium bowl. I like my avocado with chunks so I used a potato masher and then mixed it all up with a spoon. 

Serve with tortilla chips and enjoy!


Fire Roasted Corn Salsa

Charred corn and poblanos from the grill give this salsa great roasted flavors! You can control the level of heat you want with the amount of jalepenos you use, or none at all for a sweet corn salsa! This salsa goes perfect with chips or in shrimp tacos!


Ingredients:
3 poblano peppers, sliced in half and seeds removed
2 ears of corn
1 red bell pepper, diced
1/2 cup cilantro, chopped
1 tsp salt
1 tsp pepper
Juice of 1/2 lime
1/2 of 4oz can jalepenos, or less depending on how much fire you like! 
(I used half, it was very spicy and I like spicy. I think 1/4 of the can might be the perfect amount so I will try that next time)

Instructions:
1. Heat grill.
2. Once ready, spray corn with olive oil spray and season with salt & pepper.
3. Place corn and poblanos on grill. Cook on all sides until slightly charred.
4. Meanwhile, add red pepper and cilantro into a medium bowl. Add salt and pepper
5. Remove from grill. Allow corn to cool. Dice peppers and cut kernels off cob.
6. Add corn and poblanos into bowl with other ingredients. Mix well. Add lime juice and taste for season. Adjust with salt and pepper if needed. 
7. Serve immediately or chill in fridge. 

Friday, December 19, 2014

T.P. Roll reindeer


A simple craft, perfect for toddlers! It took a little bit to convince my son to let me trace his hand (He turned 2 a couple months ago) but he eventually came around and let me trace ONE hand. And it looks like he is making the sign Spock makes on Star Trek lol but I just used that to make both antlers.

 For this craft you need:

Scissors
Glue or glue stick
Brown construction paper
Toilet paper roll
Red Pom Pom ball 
Black marker to color the eyes
White construction paper for eyes
Pencil 

Trace your kiddo's hands. If they are difficult you can just do what I did and get one hand and then use that one for both. 

Draw ovals for the eyes and cut out, draw the pupil in black how ever you want, silly Googly eyes or add color if you'd like, it's all up to you :)

Last, glue on the eyes, Pom and hands. Easy! 

Friday, October 24, 2014

Turkey & Quinoa Stuffed Bell Peppers


These are seriously SO good! I have just recently gotten more brave with the veggies I am willing to eat and I've learned something... Bell peppers are delicious!


Here is what you need for this delicious dinner:

4 bell peppers of your color choice
1 cup of brown rice or quinoa, cooked just shy of done
1/2 cup black beans (canned) rinsed and drained
1/2 cup corn
1 lb ground turkey, seasoned with Ms Dash Southwest seasoning
1 cup petite diced tomatoes
1 cup tomato sauce (add more if you like it more saucy)
1/4 cup of your fave cheese

And here's what you gotta do:

1. Cook brown rice or quinoa according to directions
2. While rice/quinoa is cooking, brown ground meat and season
3. Drain and rinse black beans
4. Portion out diced tomatoes, corn, tomato sauce and cheese
5. Combine in large bowl- meat, tomatoes, corn, rice or quinoa, beans and sauce
6. Cut off caps of peppers and pull out ribs and core. Rinse excess seeds out
7. Stuff peppers with filling
8. Sprinkle with cheese
9. Bake at 375 for 45 minutes. Cheese should be melted and filling should be heated all the way through
10. Dig in! This recipe serves 4. 

I love these even more for leftovers! Enjoy!


Linking party at:  http://www.astrollthrulife.net/2015/03/260th-inspire-me-tuesday.html

Saturday, April 19, 2014

Cinnamon roll waffle

This was extremely easy to make and the kids loved it! All you need is a tube of the cinnamon rolls that you bake yourself, I used Grands Cinnabon. 

Just heat up your waffle maker, place roll in the middle and press down and allow to cook. I heated up the frosting while it was cooking that way it was warm and ready to pour over the waffle :)

These don't fill up the entire waffle maker, they are on the small side but I still found it to be pretty filling!


Wednesday, March 26, 2014

Spinach Stuffed Portabella Mushrooms

I just had this for dinner tonight and YUM!! I will definitely be making this again (and again and again...)

Here's what you need:
4 large Portabella mushrooms, stem removed
1 pkg cream cheese
1 tbsp garlic
4 tbsp Parmesan cheese
1 1/2 cup frozen spinach
1 tbsp Olive oil
Salt, to taste

Preheat oven to 375. Brush mushrooms with oil and sprinkle with salt on both sides. Place on cookie sheet and bake for 10 minutes.

While that's cookin, mix up your spinach, cream cheese, parm cheese and garlic!

Remove mushrooms from oven and allow to cool for 2imutes.

Fill each mushroom with the mixture and sprinkle top with some mozzarella cheese if you want :)

Return mushrooms to oven to bake for 10 more minutes until it is heated through.

Enjoy!!


Tuesday, March 18, 2014

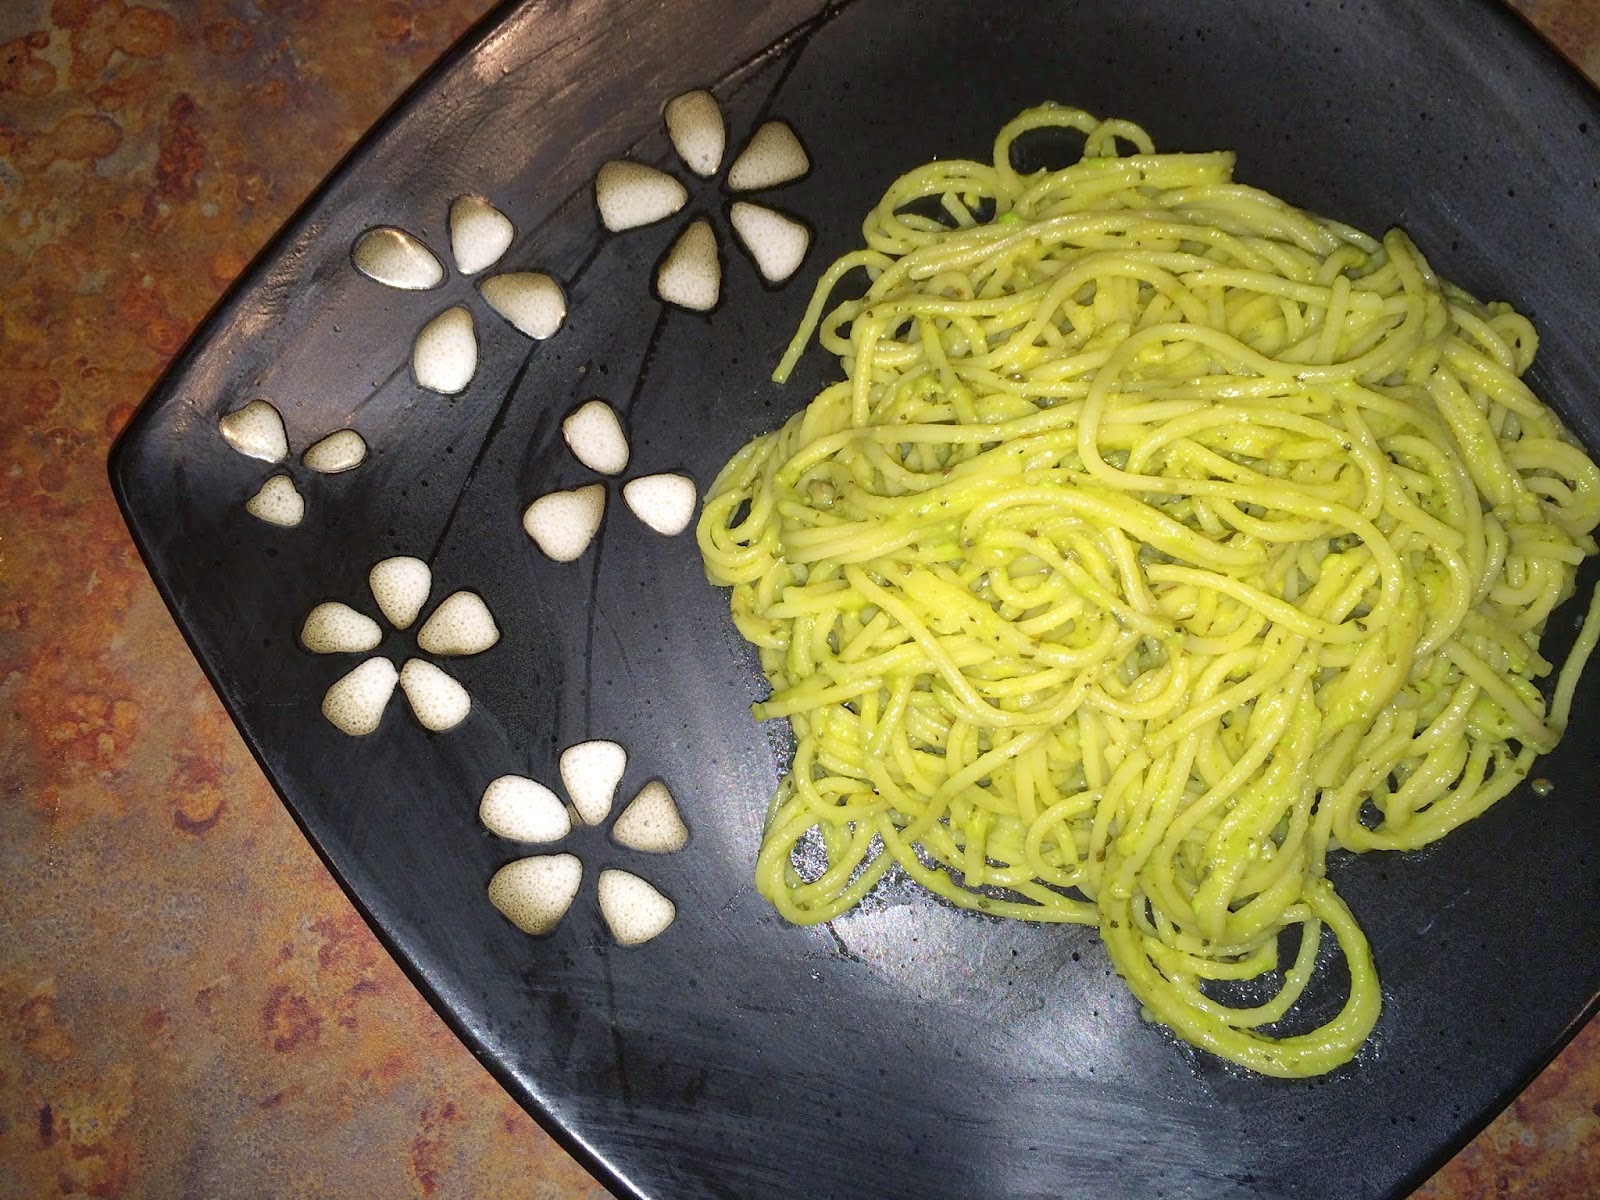
Creamy Avocado Pasta... YUM!!!


This sauce is SO good!  I. Love. it.

I do not suggest eating this with spaghetti squash though, the sweetness of the squash and the flavor of the sauce just did not go together well, I didn't like it.  But with just regular spaghetti, DELISH!!

Yield: Serves 2
Ingredients:
  • 1 medium sized ripe Avocado, pitted
  • 1/2 lemon, juiced + lemon zest to garnish
  • 1-3 garlic cloves, to taste (I used 3 and it was super garlicky, but if you are not a big fan of garlic use 1 clove)
  • 1/2 tsp kosher salt, or to taste
  • ~1/4 cup Fresh Basil, (probably optional)
  • 2 tbsp extra virgin olive oil
  • 2 servings/6 oz of your choice of pasta (I used 3oz of spelt and 3 oz of Kamut spaghetti)
  • Freshly ground black pepper, to taste

Directions:
1. Bring several cups of water to a boil in a medium sized pot. Add in your pasta, reduce heat to medium, and cook until Al Dente, about 8-10 minutes.
2. Meanwhile, make the sauce by placing the garlic cloves, lemon juice, and olive oil into a food processor. Process until smooth. Now add in the pitted avocado, basil, and salt. Process until smooth and creamy.
3. When pasta is done cooking, drain and rinse in a strainer and place pasta into a large bowl. Pour on sauce and toss until fully combined. Garnish with lemon zest and black pepper. Serve immediately. Makes 2 servings.
Please note: This dish does not reheat well due to the avocado in the sauce. Please serve immediately.


Read more from this wonderful site where I found this recipe: http://ohsheglows.com/2011/01/31/15-minute-creamy-avocado-pasta/#ixzz2vscgSpmL

 Nom Nom Nom


 So good!


Even the kids liked it!!

Monday, March 3, 2014

Winger's Sticky Fingers Copycat Recipe

After moving away, we are nowhere near a Winger's so when I found this recipe I was really excited!  My husband and I love sticky fingers!  

This picture was borrowed from Sixsistersstuff.com, where I also found this delicious recipe! 

This recipe was easy to make, makes for a great week night dinner!  It is a little spicy though, so you may want to leave a few chicken strips un-sauced if the little ones can't handle the heat!  One thing is the chicken is not as crunchy as they are at Winger's.  Every time I've tried it I just can't master the perfect crunch.  But I'm working on that!

Winger's Sticky Fingers Recipe:
1 pkg. frozen breaded chicken strips (We use Tyson brand)
6 Tbl. Frank's Hot Sauce (It has to be Franks Hot Sauce, no other sauce will taste as good)
4 Tbl. water
1 1/2 c. brown sugar
Chicken:
 Prepare the chicken strips as directed on the back of the package.
Sauce:
Heat hot sauce, water and brown sugar in a saucepan over medium heat, until sugar is dissolved.
Pour sauce over chicken, and enjoy!  Serve with ranch dressing for dipping.
Serves 2-3 people.
I found this recipe & many other delicious recipes on the link provided.  Check them out, their blog is amazing!
http://www.sixsistersstuff.com/2011/12/wingers-sticky-fingers-copycat-recipe.html

Wednesday, February 26, 2014

Crock Pot Spinach & Tortellini

This meal is delicious, doesn't require a laundry list of ingredients and doesn't take long to prepare.  Did I mention it's delicious?

All you need is:

1 package 1/3 less fat cream cheese
1 package Buitoni three cheese tortellini
1 bag frozen chopped spinach
1 can vegetable broth
1 can roasted garlic tomatoes

Combine in crock pot.
Cook on high for 3 hours, or low for 4-5

And that's it!  My kids even like this & my husband loves it!

And the calorie count is 487 calories for 1 cup


Friday, January 31, 2014

Chocolatey Pretzel Treats


These are so easy to make!  My kids had fun helping with them and we all loved them, they make a great snack!  We did these over Christmas so we used the Christmas color M&Ms but you can use the regular kind or whatever holiday colors are out at the moment!

All you need is:
1 Bag of small pretzels
1 bag M&Ms (I used peanut ones, I accidentally grabbed those instead of plain but they worked great)
1 bag hershey kisses, or hugs (I also tried the cookies & cream kind and they didn't work out as well as the plain chocolate)

Heat the oven to 170 degrees.  Place pretzels in a single layer and place kisses on top of each pretzel.  Bake 4-6 minutes until the chocolate feels soft.  Do not over do it though, you don't want a chocolate puddle!  Press M&Ms into the center of each treat.  Allow to cool and then place in the fridge for about 10 minutes to set.